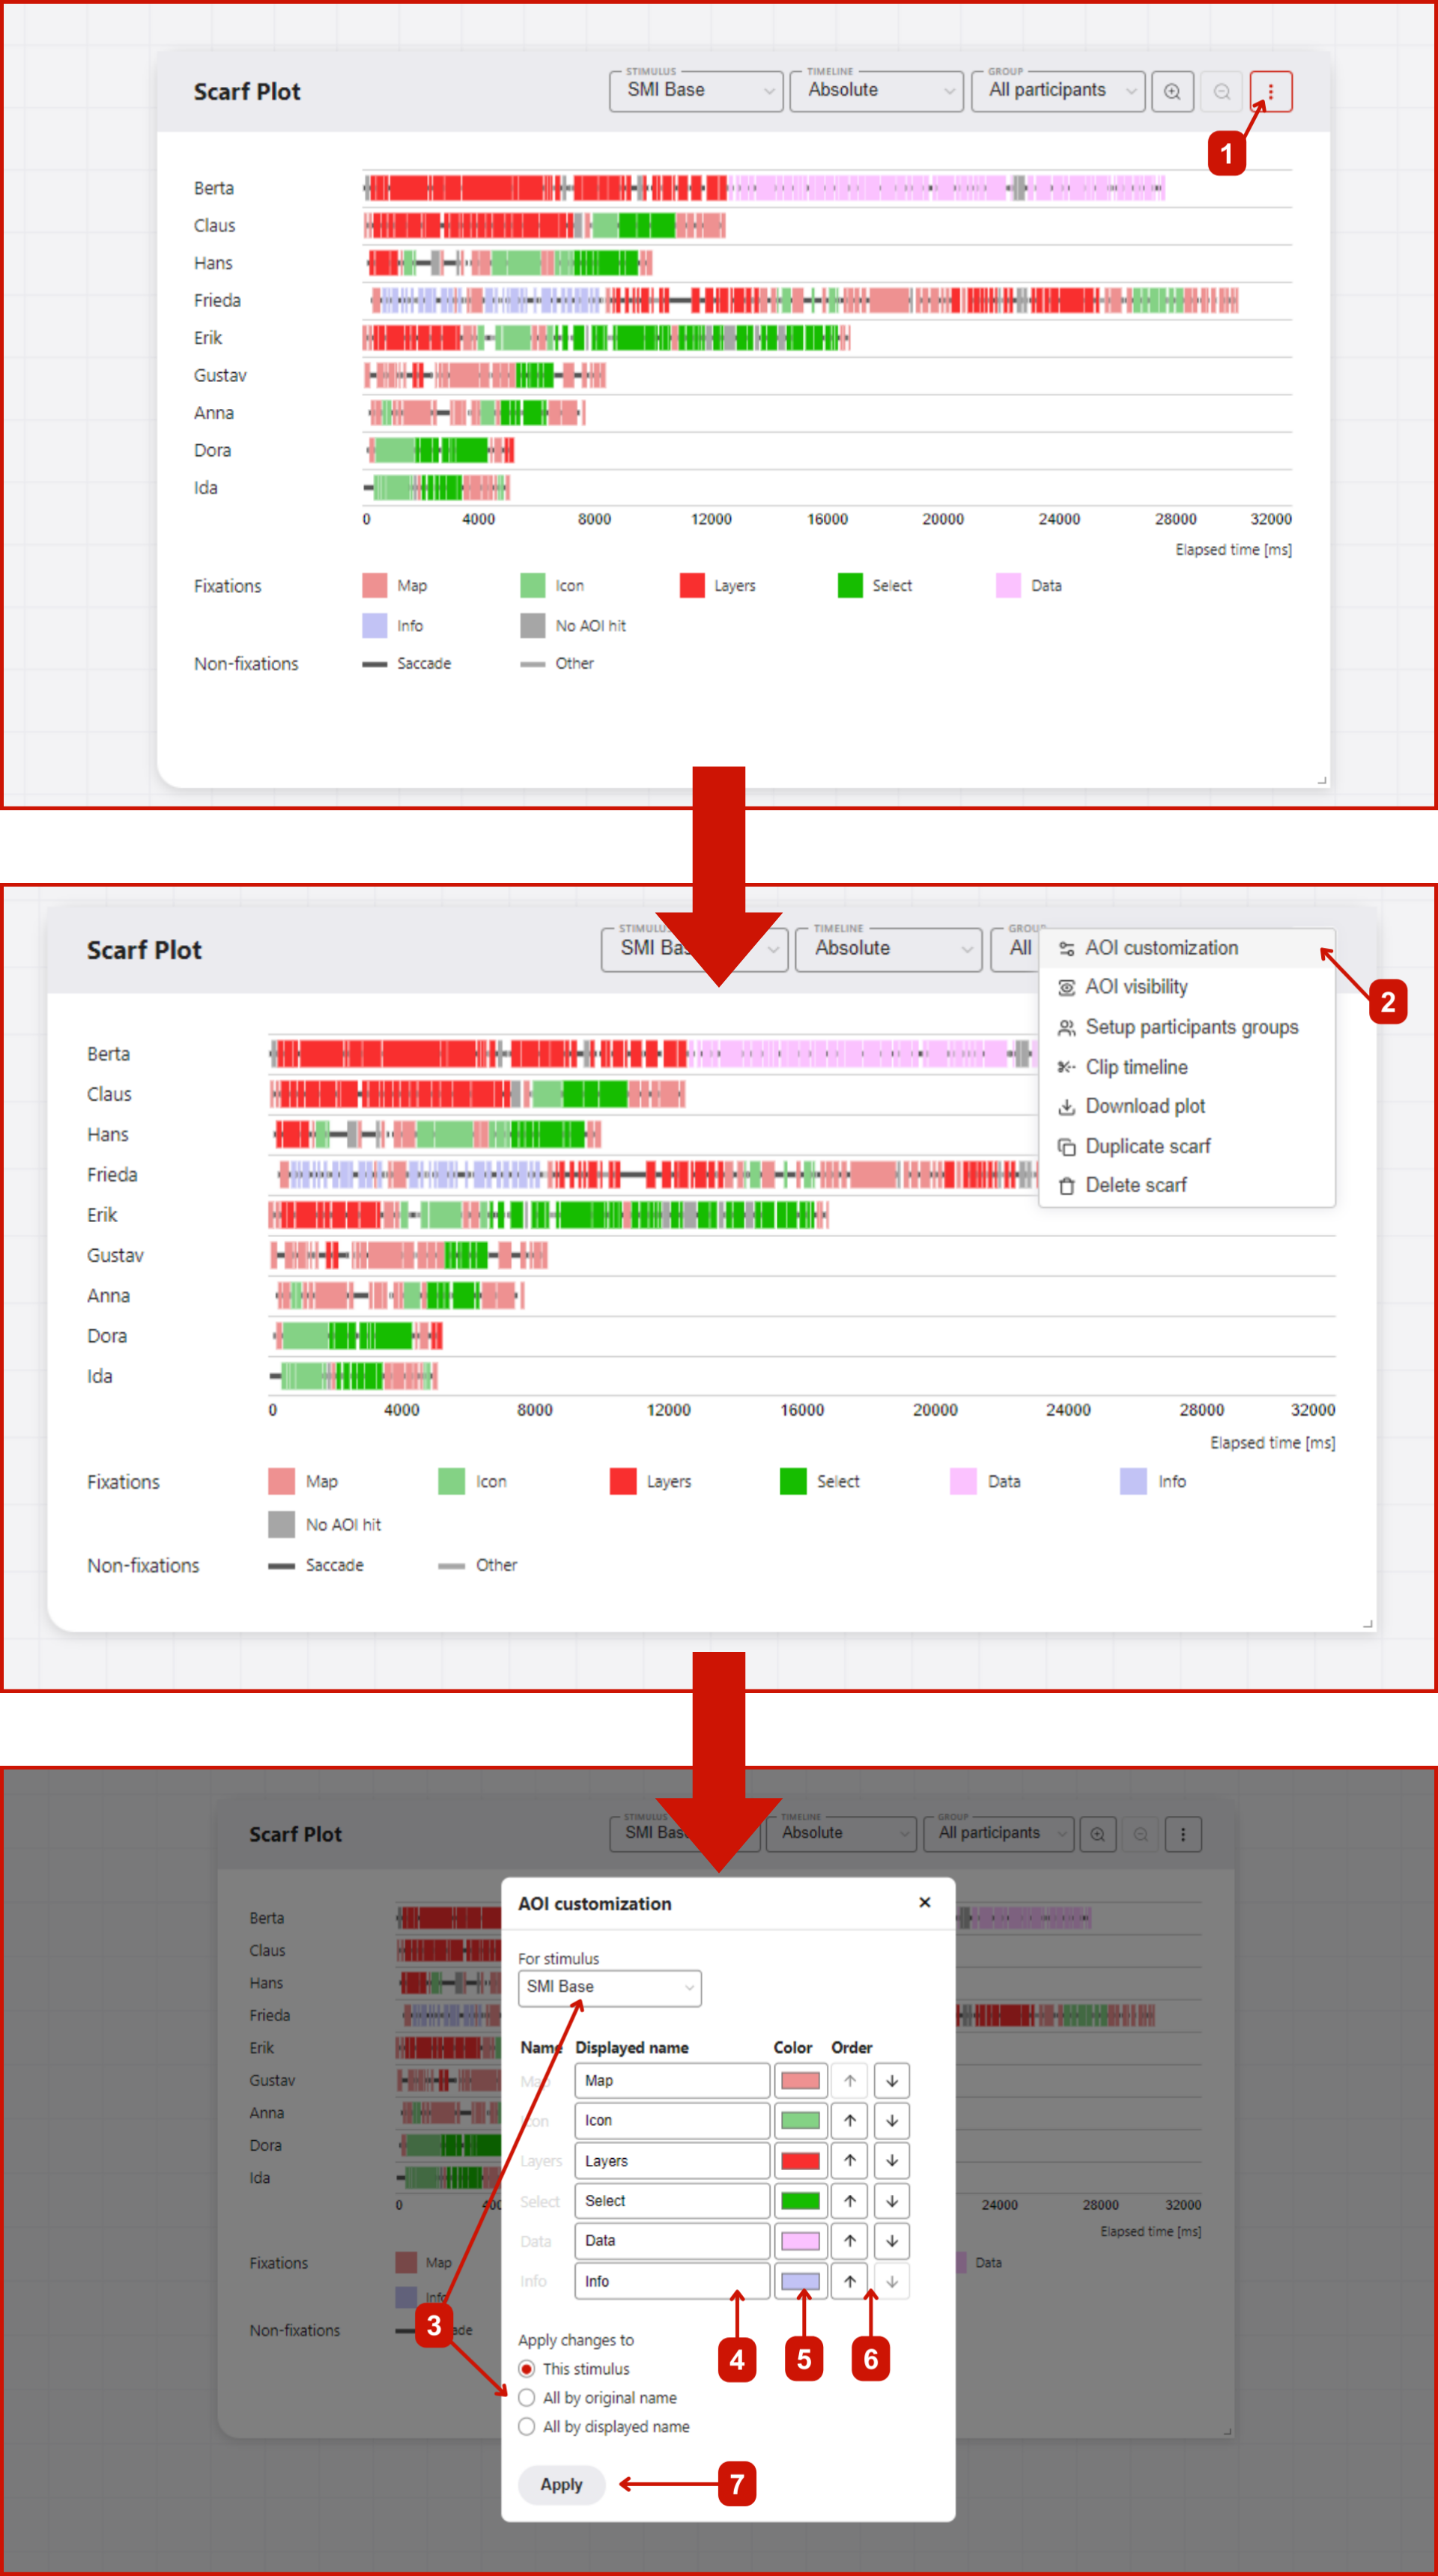
AOI Customization
AOI customization in GazePlotter allows you to modify the appearance, names, and order of Areas of Interest (AOIs) in your eye-tracking visualizations. You can create AOI groups, change colors, and apply changes across multiple stimuli.
Accessing AOI customization
To customize AOIs:
- Click on the
More optionsbutton in the top right corner of any plot. - Select
AOI customizationfrom the pop-up menu.
Stimulus Selection
Choose which stimulus to customize using the For stimulus dropdown. Changes can be applied to the current stimulus only or across all stimuli. Each stimulus has its own set of AOIs.
Individual AOI Editing
For each AOI you can:
- Edit the
Displayed namewhile keeping the original name unchanged - Change the
Color(only for group leaders or ungrouped AOIs) - Reorder using up/down arrows in the
Ordercolumn
AOI Grouping
AOIs with identical displayed names are automatically treated as a single group in visualizations:
- Group behavior: AOIs sharing the same displayed name act as one unit
- Color inheritance: The first AOI in each group determines the color for all group members
- Group management: Only the first AOI shows color and order controls
- Detaching from groups: Change an AOI's displayed name to remove it from a group
Bulk AOI Sorting
Click on column headers to sort AOIs:
- Name - sorts by the original AOI names
- Displayed name - sorts by the current displayed names
- Click again to reverse sort direction (ascending/descending)
The sorting uses natural ordering for proper numeric sequence handling.
Apply Changes Options
Choose how to apply your modifications:
- This stimulus - apply changes only to the currently selected stimulus
- All by original name - apply changes across all stimuli matching original AOI names
- All by displayed name - apply changes across all stimuli matching displayed AOI names
INFO
When applying to all stimuli, AOI ordering is only updated for the current stimulus.
Applying Changes
Click Apply to save all modifications. Changes are discarded if you close the window without applying.
AOI Grouping Tip
AOIs with identical displayed names will be treated as a single group in visualizations. To create groups, give multiple AOIs the same displayed name. The color of the first AOI with each name will be used for the entire group.